Dirty but otherwise sound
Clean and dry it according to the manufacturer’s directions. Inspect the handle and any folding mechanism before use.
PRACTICAL SKILLS · LEARN BEFORE YOU NEED IT
Start with the knife you own, its instructions and a controlled workspace. This guide covers ordinary cutting tools with a straight edge.
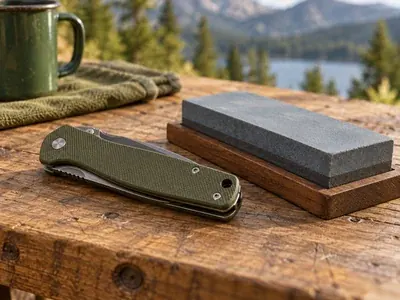
Clean and dry it according to the manufacturer’s directions. Inspect the handle and any folding mechanism before use.
Use a compatible manual sharpener and the maker’s specified angle. Start with a modest touch-up instead of aggressive metal removal.
A professional sharpening or repair service may be the better choice. Serrated, ceramic and specialty blades need their own instructions.
Work in good light on a stable surface, without distractions. Keep fingers out of the blade’s path and follow the sharpener’s holding instructions. Stop if the tool or blade moves unpredictably. Do not test an edge on your skin or try to catch a falling knife.
A knife is not a pry bar or screwdriver. Put it away securely when the job is finished, especially around children.
Sharpening principles: Buck’s illustrated sharpening guide (opens in a new tab). Its product-specific angles should not be assumed for another brand.
Read its instructions and practice with it before buying another system.
Ask a local sharpening service about your blade. Compare that cost with buying and learning equipment.
Choose a tool only after identifying the blade, angle and maintenance task. A more expensive powered system is not the necessary first step.
For a go-bag, start with what the bag needs to do. A tool earns space by serving a real task, not by looking like survival equipment.
Reviewed September 10, 2026. This is a preparation guide, not hands-on product testing or training certification.
Choose for the blade and maintenance task. All three are manual tools; higher spending buys guidance and accessories, not a need to replace equipment you already own.
A compact manual tool for occasional touch-ups, with diamond surfaces, ceramic and a strop.
The blade is not clamped. Its 20°/25° guides must suit the edge; maintaining control still takes practice.
Manufacturer price $48.95 at review. Standard Guided Field Sharpener, not Elite or Blackout. Match the knife maker's angle and sharpening directions.
Manufacturer / product details ↗ (opens in a new tab)A clamped bench system with adjustable angle and three abrasive stages for repeatable maintenance.
Needs a stable work surface and a blade that fits the clamp; not a pocket tool.
Manufacturer price $87.95 at review. 15°–30° angle adjustment; 320/600 diamond and fine ceramic. Check blade geometry and clamping instructions.
Manufacturer / product details ↗ (opens in a new tab)Adds abrasive choices, a leather strop and a case for someone maintaining several suitable knives.
More equipment to learn and store. The basic system may already cover occasional sharpening.
Manufacturer price $149.95 at review. 15°–30° adjustment and seven abrasive stages. This is Precision Adjust Elite, not Professional Precision Adjust Elite.
Manufacturer / product details ↗ (opens in a new tab)Research reviewed September 12, 2026. Manufacturer specifications, not hands-on testing. Prices are dated manufacturer references, not live Amazon offers; stock and prices can change. Links may earn a commission. Affiliate disclosure.

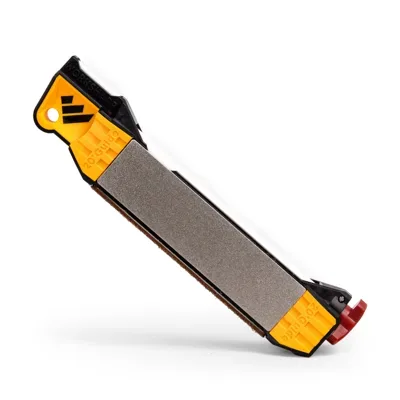 Work Sharp Guided Field Sharpener WSGFS221
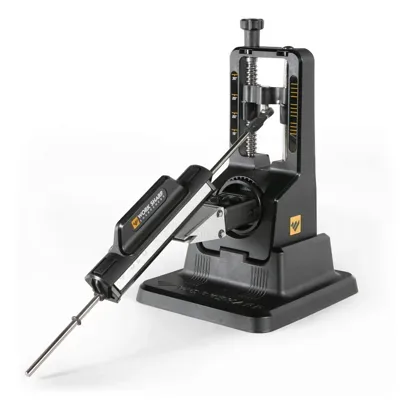 Work Sharp Precision Adjust WSBCHPAJ
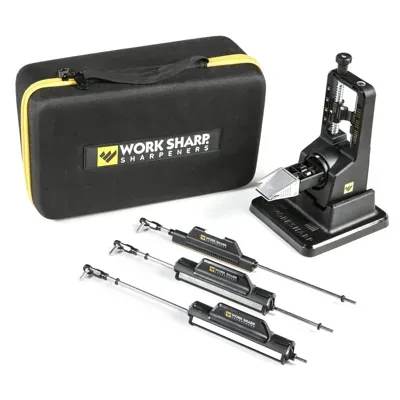 Work Sharp Precision Adjust Elite WSBCHPAJ-ELT